OnePress Plus Documentation
In this article:
- Installation
- OnePress Plus: Auto Update
- OnePress Plus: Section Orders & Styling
- Section Slider NEW (v2.0.9)
- Section Setup: Projects
- Section Setup: Testimonials
- Section Setup: Map
- Section Setup: Pricing
- Section Setup: Call To Action
- Section Setup: Gallery
- Theme Options: Typography
- Theme Options: Footer Copyright
Install OnePress Plus
The first thing you will need to know: OnePress Plus is a WordPress Plugin, it required OnePress theme to run. If you do not install OnePress theme yet then you can download it at your FameThemes Dashboard or here.
- Go to your FameThemes dashboard and download the OnePress Plus plugin.
- In your WordPress admin dashboard, navigate to Plugins -> Add New and upload onepress-plus-v.x.x.x.zip ( the file you recently download )
- Activate it.
- Go to Appearance -> Customizer and you will see all the OnePress Plus features.
Enable Auto Update
In order to enable auto update for the OnePress Plus plugin, you will need to get your license code first.
1. Go to your FameThemes dashboard page, click on Licenses tab and copy your license code:

2. Go to your WordPress admin, go to Appearance -> OnePress Theme -> OnePress Plus License, paste your license code to License Key field and click Save Change.
3. That's all, you will get new update notification just like other wordpress.org plugins.
Section Orders & Styling
- 1
- Section Orders: After installing OnePress Plus plugin, go to Customizer -> Section Orders & Styling panel to start re-order your sections:

- 2
- Section Styling: Go to Customizer -> Section Order & Styling -> Click to the section name to start change section style
- Show this section: Show or hide section
- Inverted Style: Light or Dark style
- Background Color
- Background Image
- Parallax: Works when background image field has an image
- Background Video: The hosted background video, upload your own video or download free here http://coverr.co/
- Overlay color: Overlay background color for a section, only apply when using Background Image, Background Parallax and Background Video.
- Overlay color opacity: Default is 0.3
- Section padding-top
- Section padding-bottom

Section Setup: Slider
This section requires the OnePress version 2.2.0 or greater to work properly.
1. Enable the slider
Go to: Customize -> Section Order & Styling -> Section Slider -> Check to option "Enable this section".
By default, this section is disabled.

If the slider item is not shown in Section Order & Styling, please try going to Appearance -> OnePress Theme and turn on Section Slider -> then hit Save Changes button.
2. Adding slide
Go to Customizer -> Section: Slider -> Content

Click to "Add an item" button to add more slides.
Additional settings of each slide item:
- Background media
- Title: Custom slide title.
- Content: Custom slide content
- Alignment: Slide content alignment.
- Button #1 label
- Button #1 link
- Button #1 style
- Button #1 label
- Button #2 link
- Button #2 style
3. General Slider Settings
Go to Customizer -> Section: Slider -> Settings

Available slider settings:
- Section ID: The custom section ID
- General
- Full screen
- Infinity loop.
- Autoplay
- Pause on hover.
- Auto height
- Mouse drag enabled.
- Touch drag enabled.
-
Go backward when the boundary has reached.
- Next/Prev Navigation
- Show next/prev buttons.
- Show on hover only.
- Background Color
- Background Hover Color
- Arrow Color
- Arrow Hover Color
- Dots Navigation
- Show dots navigation.
- Show on hover only.
- Color
- Active color
- Parallax
- Enable the parallax effect for the slider.
- Effect
- Animation In Effect.
- Animation Out Effect
- Autoplay interval Timeout
- Autoplay speed.
- Slide Settings
- Padding top
- Padding bottom
- Title color
- Content color
- Overlay color
- Typography
- Title typography
- Content typography
Section Setup: Projects
1. Add your projects: In your WP dashboard go to Portfolio post type and start to add your project.
2. Customize the project sections: Go to Customizer -> Section: Project and open projects section settings:

- Section ID
- Section Title
- Section sub-title
- Number of projects to show
- Project order by
- Project order
- Project slug: If you change this, you will need to re-save your permalink in Settings -> Permalink
- Project Ajax setting: Use Ajax to load project detail or open single project detail.
Also, OnePress Plus 2.0 comes with a new project page template where you can show all your works in one place. The setting for it is the same as the Project section on the front page. Take a look at our project demo page.

P/s: The recommend thumbnail image size for Project section is 640*400px.
Section Setup: Testimonials
Section Settings:
- Section visibility
- Section ID
- Section Title
- Section Sub Title
Section Content: Click "Add an item" button to open a page selector, from there you can add testimonial:
- Testimonial Name
- Testimonial Avatar
- Testimonial Subtitle: Roles or something like that.
- Testimonial Content
- Style: Theme style or 4 default color style inherit from bootstrap
Section Setup: Map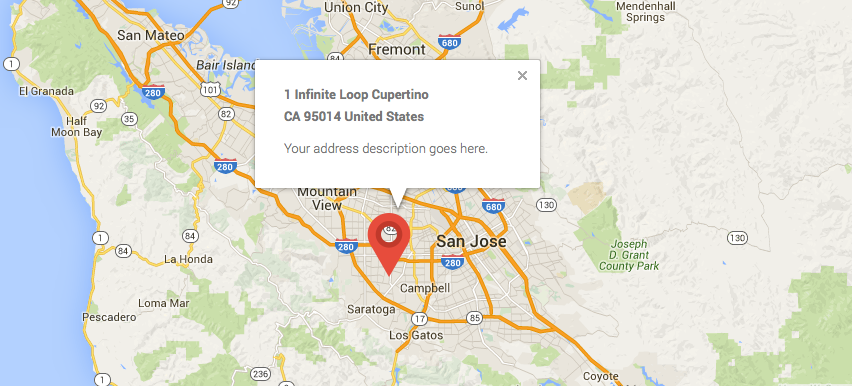

Section settings:
- Section ID
- Address Latitude
- Address Longitude: Find your Latitude, Longitude Here
- Address
- Extra address info
- Maker icon
Section Setup: Pricing
Section Settings:
- Section visibility
- Section ID
- Section Title
- Section Sub Title
Section Contents: Go to Customizer → Section: Pricing → Section Content → Click "Add an item" button to add pricing column with settings:
Section Setup: Call To Action
Section settings:
- Section ID
- Title
- Button text
- Button link

Section Setup: Gallery
This section added from OnePress theme version 1.2.6 and OnePress plus version 1.1.3. Also see setup Gallery section here
Setup Facebook Gallery
- Create new Facebook app.
- Select Source as Facebook.
- Enter Facebook Fan page album URL or album ID, example: https://www.facebook.com/vnesportstv/photos/?tab=album&album_id=584256218419365 or 584256218419365
- Enter your Facebook API: Facebook API, example: {App_ID}|{App_Secret}. Click here to create an app.
- Setup display as you want.

Setup Instagram Gallery
- Select Source add Instagram.
- Enter Instagram username.
- Setup display as you want.

Setup Flickr Gallery
- Select Source add Flickr.
- Enter Flickr username.
- Enter your Flickr API key, Click here to create a Flickr App.
- Setup display as you want.

Theme Option: Typography
Go to Customizer → Typography → Change your typography from 600+ google fonts and font style

Theme Option: Copyright Text
Go to Customizer → Theme Options → Footer Copyright → Change to your copyright text. Also, you can hide the theme link there.
